A Quick Look Ahead
Welcome To My Main Bedroom Renovation
This room has been through quite a journey.
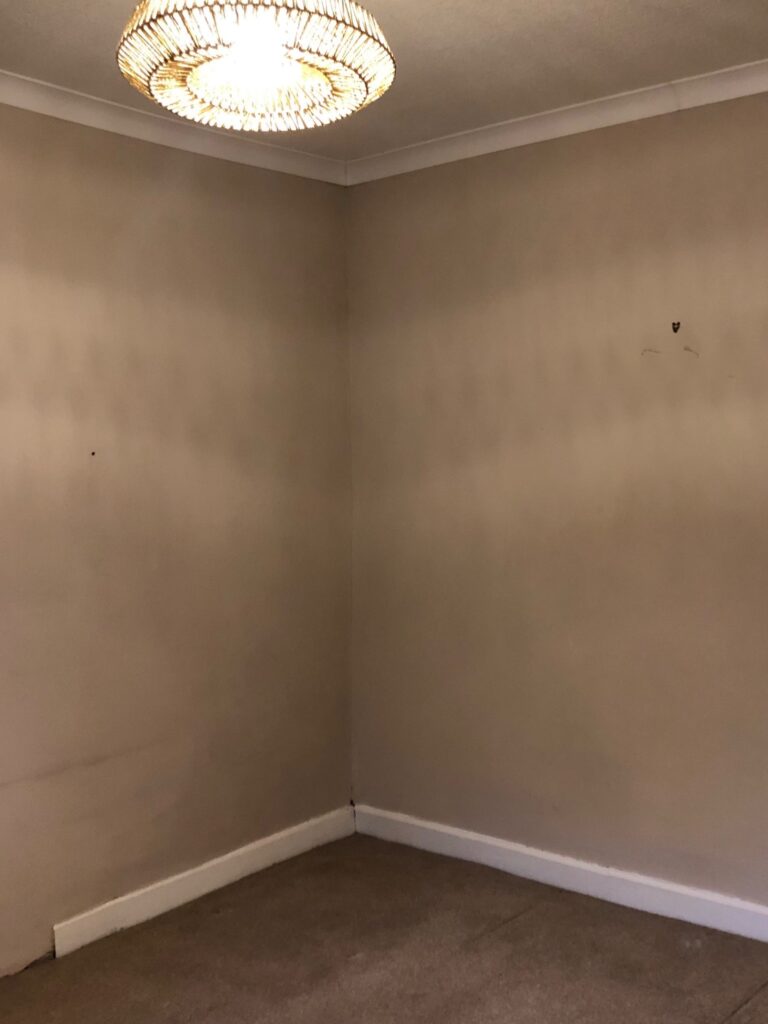
What started as a wallpapered ceiling, peachy-beige walls and a very tired shell slowly turned into one of my favourite spaces in the house. It definitely wasn’t a quick fix – there were endless decisions, more paint and fabric samples than I’d like to admit, and more than a few renovation hiccups along the way.
In this post I’m sharing the full transformation of this main bedroom – from bare beginnings to the finished space. If you’re looking for bedroom renovation before and after inspiration, this Victorian property makeover shows how the room changed, the design choices I made, and the details that brought the finished bedroom together. I hope it gives you some inspiration.
You can also see other parts of the renovation project here.
(A side note — some of these images were taken on an old iPhone, so apologies if they aren’t the best quality.)
This post may contain affiliate links. This means if you click and buy I may receive a small commission with no cost to yourself. Please see my full disclosure policy for more details.
How It Began – The ‘Before’
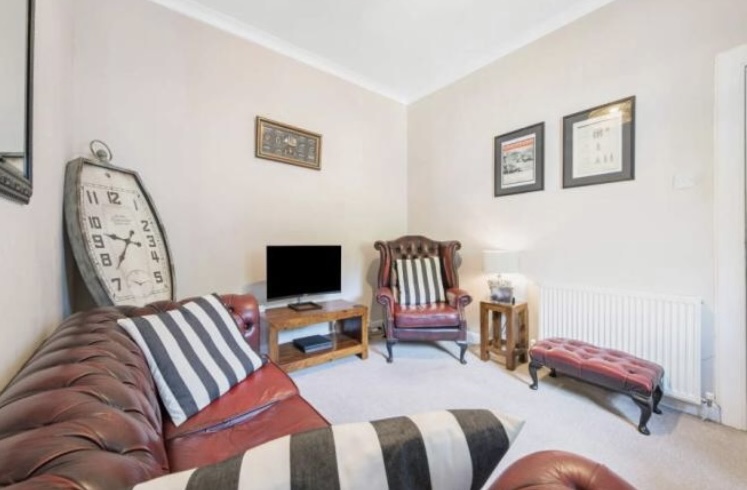
What The Main Bedroom Looked Like at the Beginning

Timeline
The first overall renovation job was 4 out of 6 windows needed replacing – an unexpected job and cost. For anyone moving into a new home – always expect more needing done than you planned for.
This main bedroom was the first room started in January 2022 with removing the ceiling wallpaper and polystyrene coving. The window planning then took over before the full bedroom renovation began in May 2022 and lasted until mid July 2022.
But, it was technically the last room to be completed, as I left making the headboard until the very last DIY task. I didn’t have the space or any of my upholstery materials available (these were still in boxes buried deep in storage) at the time. I will be creating a blog post about the steps I took to make the headboard, so keep an eye out for that.
The Challenges Of This Main Bedroom Renovation
I don’t think the property had any interior updates in it’s previous 9 years before I bought it, so there was a lot of work to get done. And I’ll admit now, I hugely underestimated how much!
The plan was to renovate one room at a time, gradually moving my belongings (and bed) from room to room. Only when all my shiny new power tools started taking over, did I quickly realised that I could not live like this for very long – so the marathon DIY journey began.
I’m sure many people that own or have renovated an old Victorian property will no doubt mention it’s a labour of love, because old properties like to throw some curve-balls at times.
But, I could see the vision……and I was determined to get every detail within my control the way I wanted it.
Main Bedroom Mood Board & Layout Changes
This room was always going to be turned back into a main bedroom, and I had a lot of bedroom decor ideas which I had to narrow down quickly to get the renovation moving along. It was also the first room of many to be renovated, so I needed to get it right from the start.
Luckily, I studied Interior Design at University years ago and can visualise spaces well. But, that also comes with having a million ideas running through my head also.
2D Plan & Design Sketches
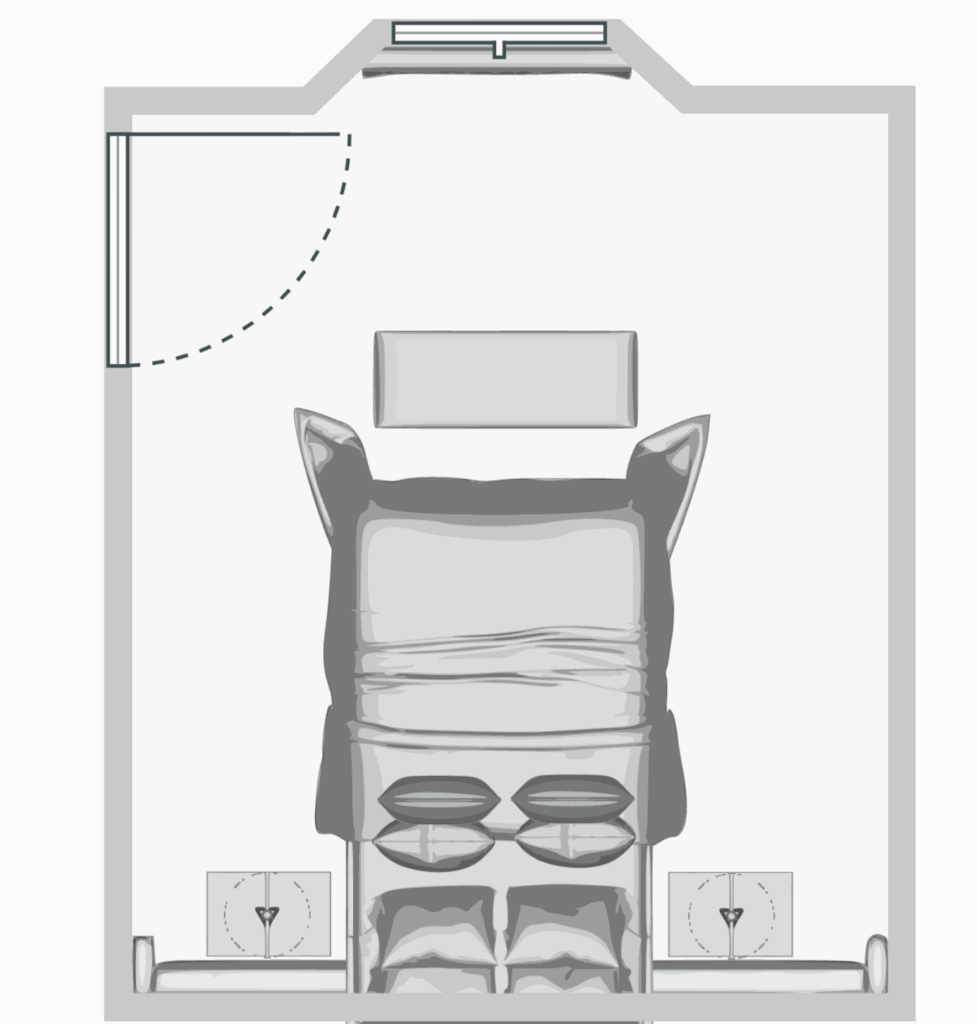
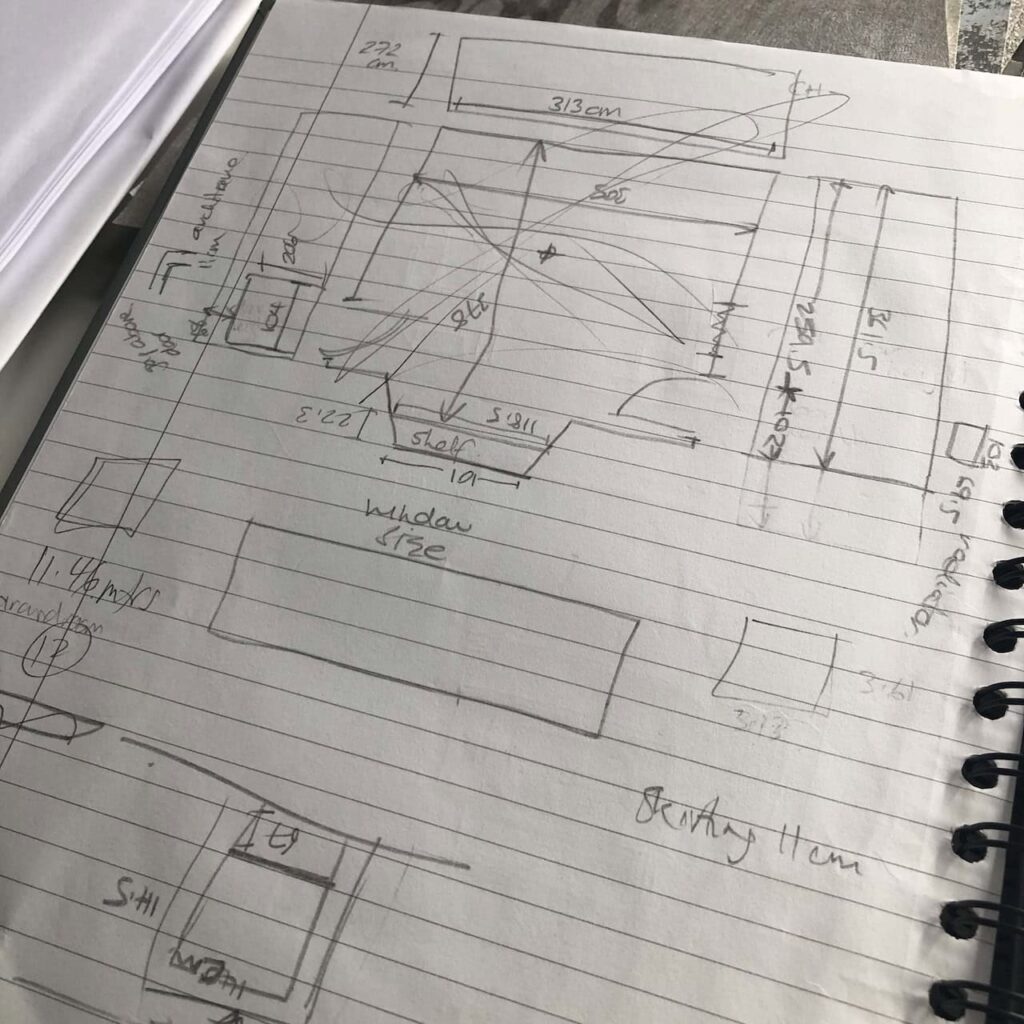
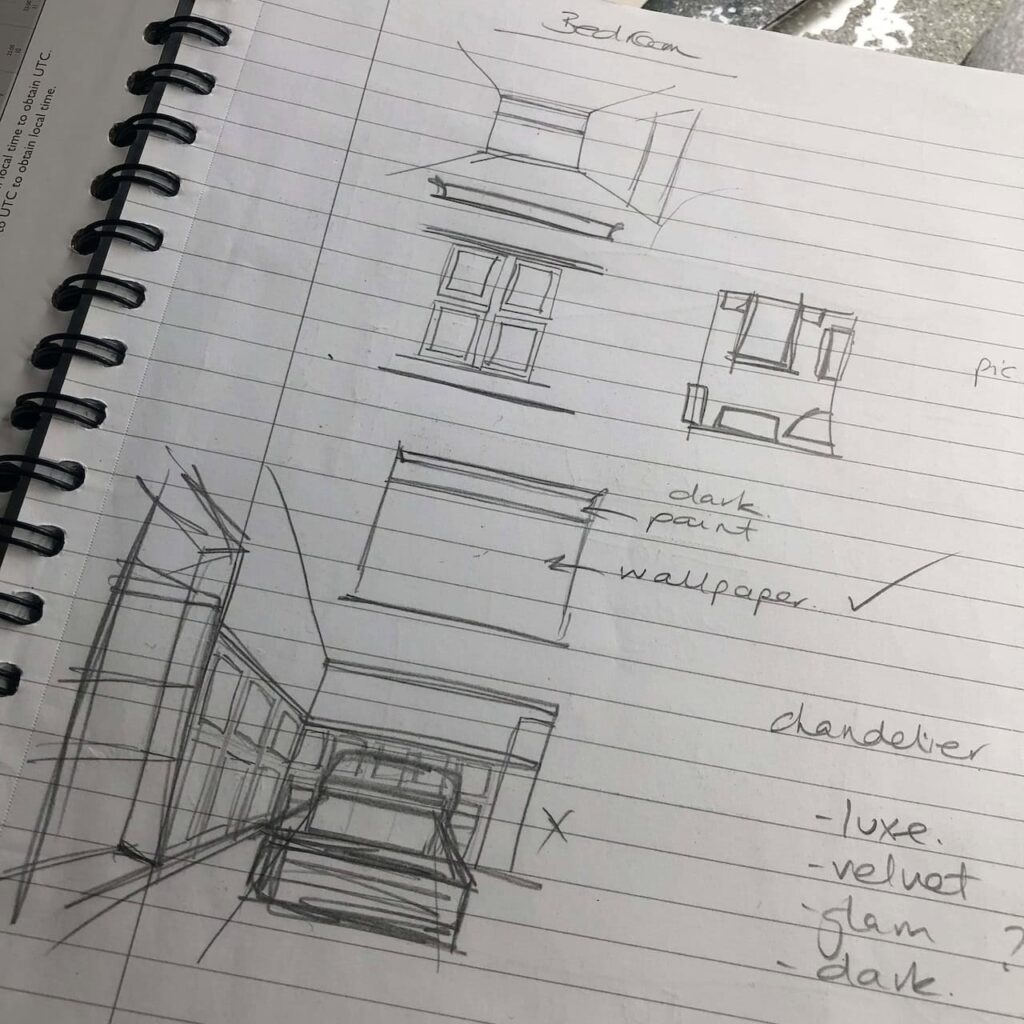
These are the messiest, roughest sketches ever but I just wanted to share that sometimes getting it sketched out can help to dismiss ideas, even the ones with ticks next to them here didn’t make the cut.
To get started, the room is north facing so quite a dark space. So, I thought I’d lean into a moody vibe and my most favourite colour is navy blue. I’ve always been drawn to moody bedroom ideas, and navy felt like the perfect anchor. I then created a mood board with images of the overall feel I wanted for the bedroom decor.
Where I Found My Bedroom Decor Ideas
If you’re struggling for inspiration, check out my Pinterest account where I have 150+ boards covering all styles of home decor and ideas. I looked for inspiration on Pinterest and Instagram as well as a few shops visits.
My advice is to screenshot or take pictures of everything that you like, so you can pull them together within a mood board or even just a folder on your computer that you can gather them in one place.
The Inspiration Board
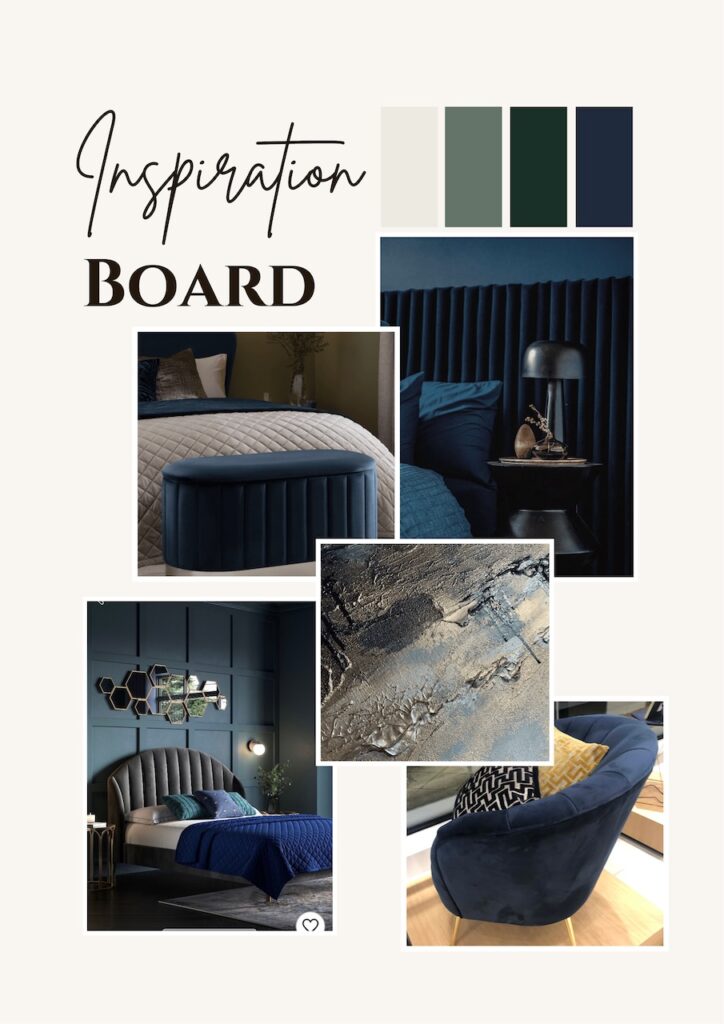
This inspiration mood board helped with my main bedroom decor ideas a lot. I’m not shy of mixing together colours that in theory shouldn’t work but once they are together in a space and styled right – look great! Well, at least in my opinion! 😂
Colour Scheme & Paint Choices
If you’re needing some inspiration, visit my Mood Board page for more ideas.
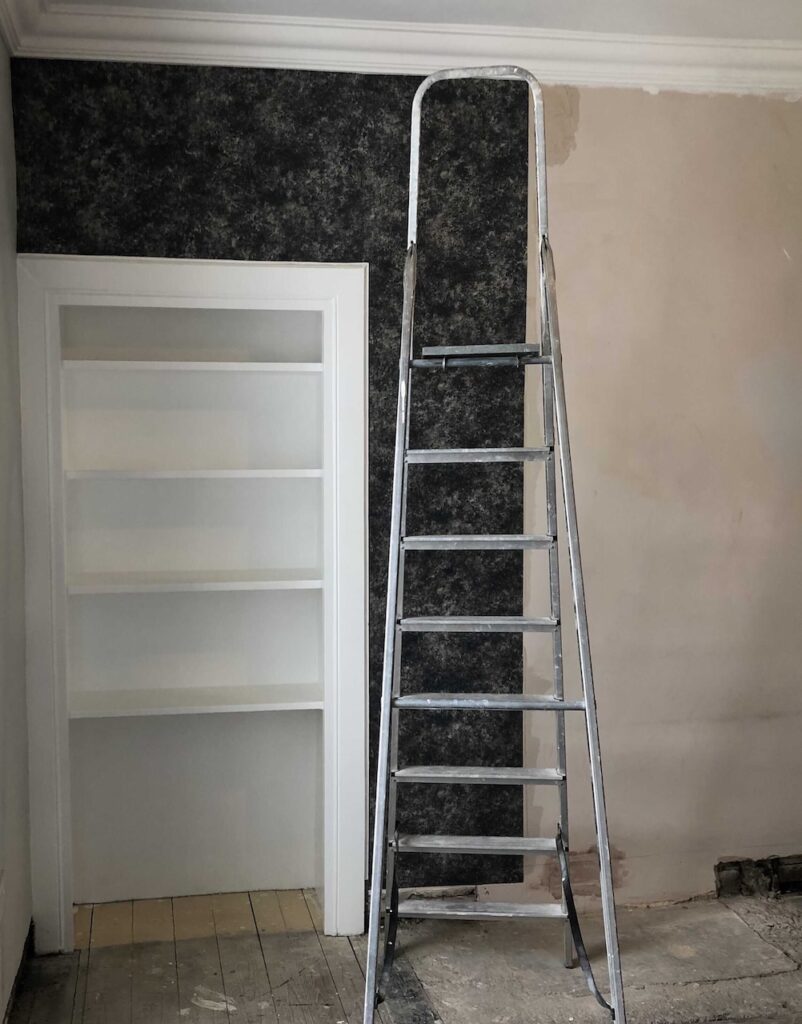
I knew I wanted to make a wall-to-wall tall headboard. That was my starting point for colour and texture and the deciding factor for the layout. I’d found a navy and champagne textured wallpaper that created the dark, moody style that I was wanting.
Though, me being me, I didn’t want the wallpaper on the same wall as the headboard, so I was essentially creating two focal points in the bedroom. Then, I chose the navy fabric for the headboard and the rest of the room flowed from there.
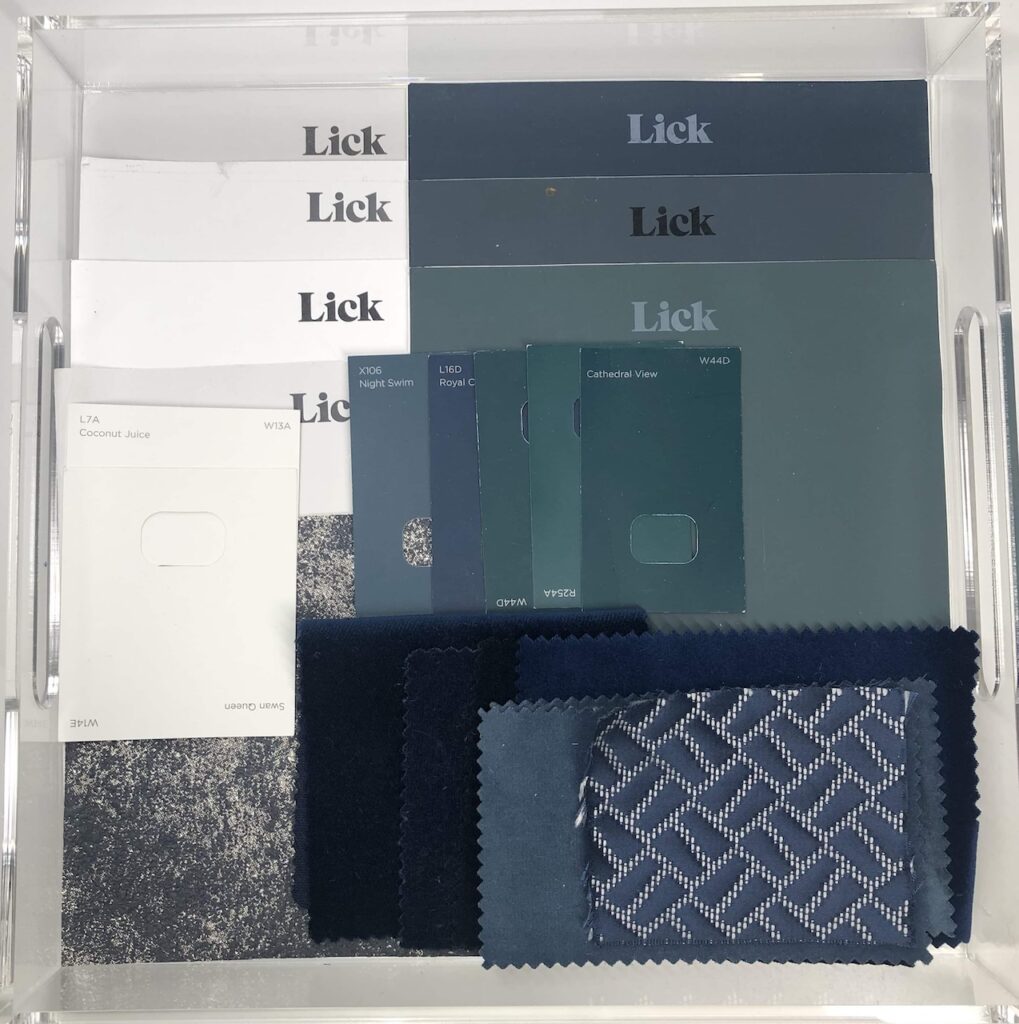
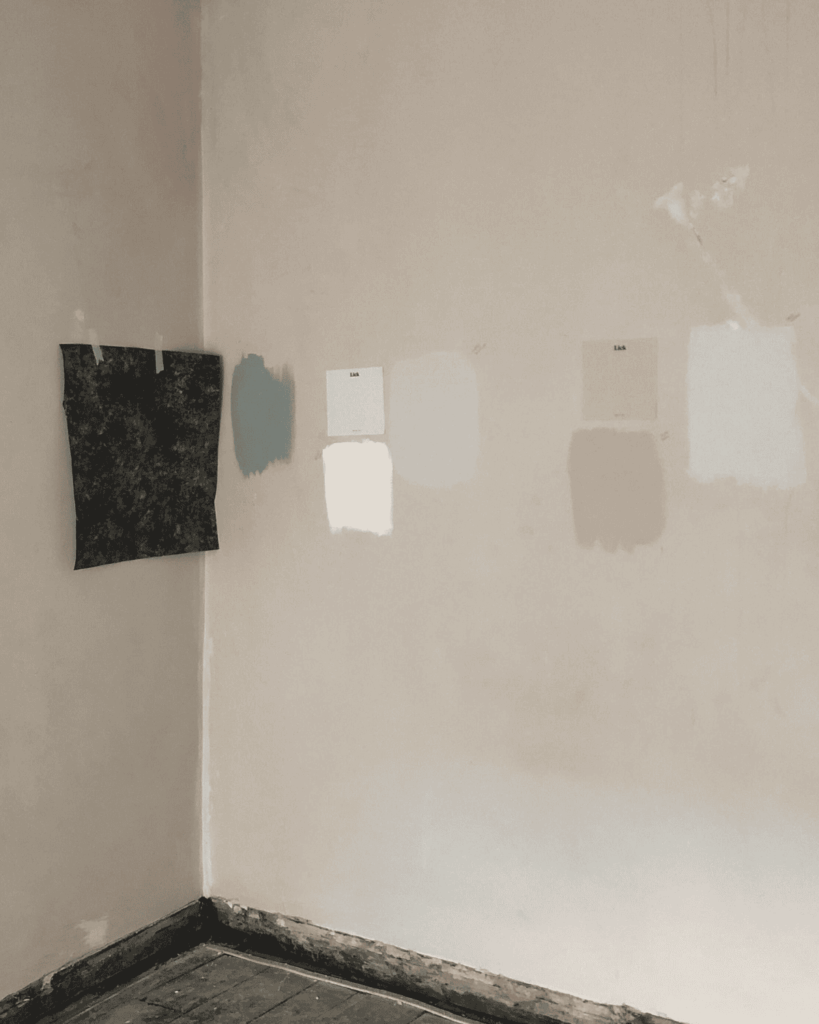
Above, is all the different paint colour swatches that I collected – it was a process! This enabled me to decide where I wanted colour, wallpaper and how dark I was prepared to go.
At this point, I knew I’d be selling the property within a few years so I wanted to decorate it for me but I also had that at the back of my mind……so decided to hold off painting the ceiling dark until my next home 🫣
Renovation Process – Step by Step
Now, I have to be honest and say there was no strict timeline plan or defined budget at this stage – I was just doing what was needed to upgrade and modernise the property. I had the bedroom furniture already waiting in storage so I didn’t have that expense for this room.
Due to the property being about 120 years old, there’s a lot of wonky everything! The quirks of old properties but it does add to the challenges and figuring out how to overcome them. That’s the reality of any Victorian home renovation – lots of character, but lots of quirks to tackle too.
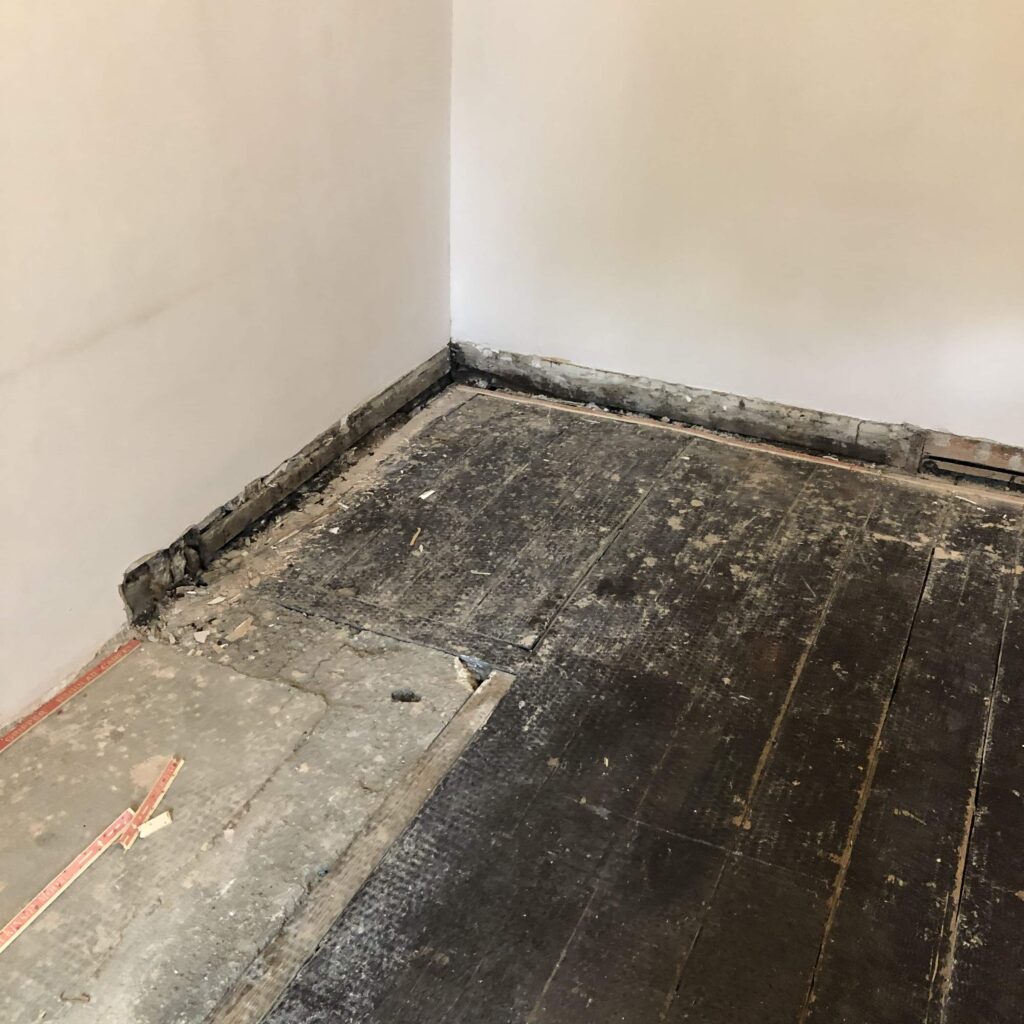
After lifting the old carpets I discovered every room had these old cement hearths from the original fireplaces. And, nope I had no interest in finding out what was behind the walls – if it was my forever home then I’d definitely be knocking a hole in the wall and having a look though.
Stripping Back and Preparing the Space
Everything needed done –
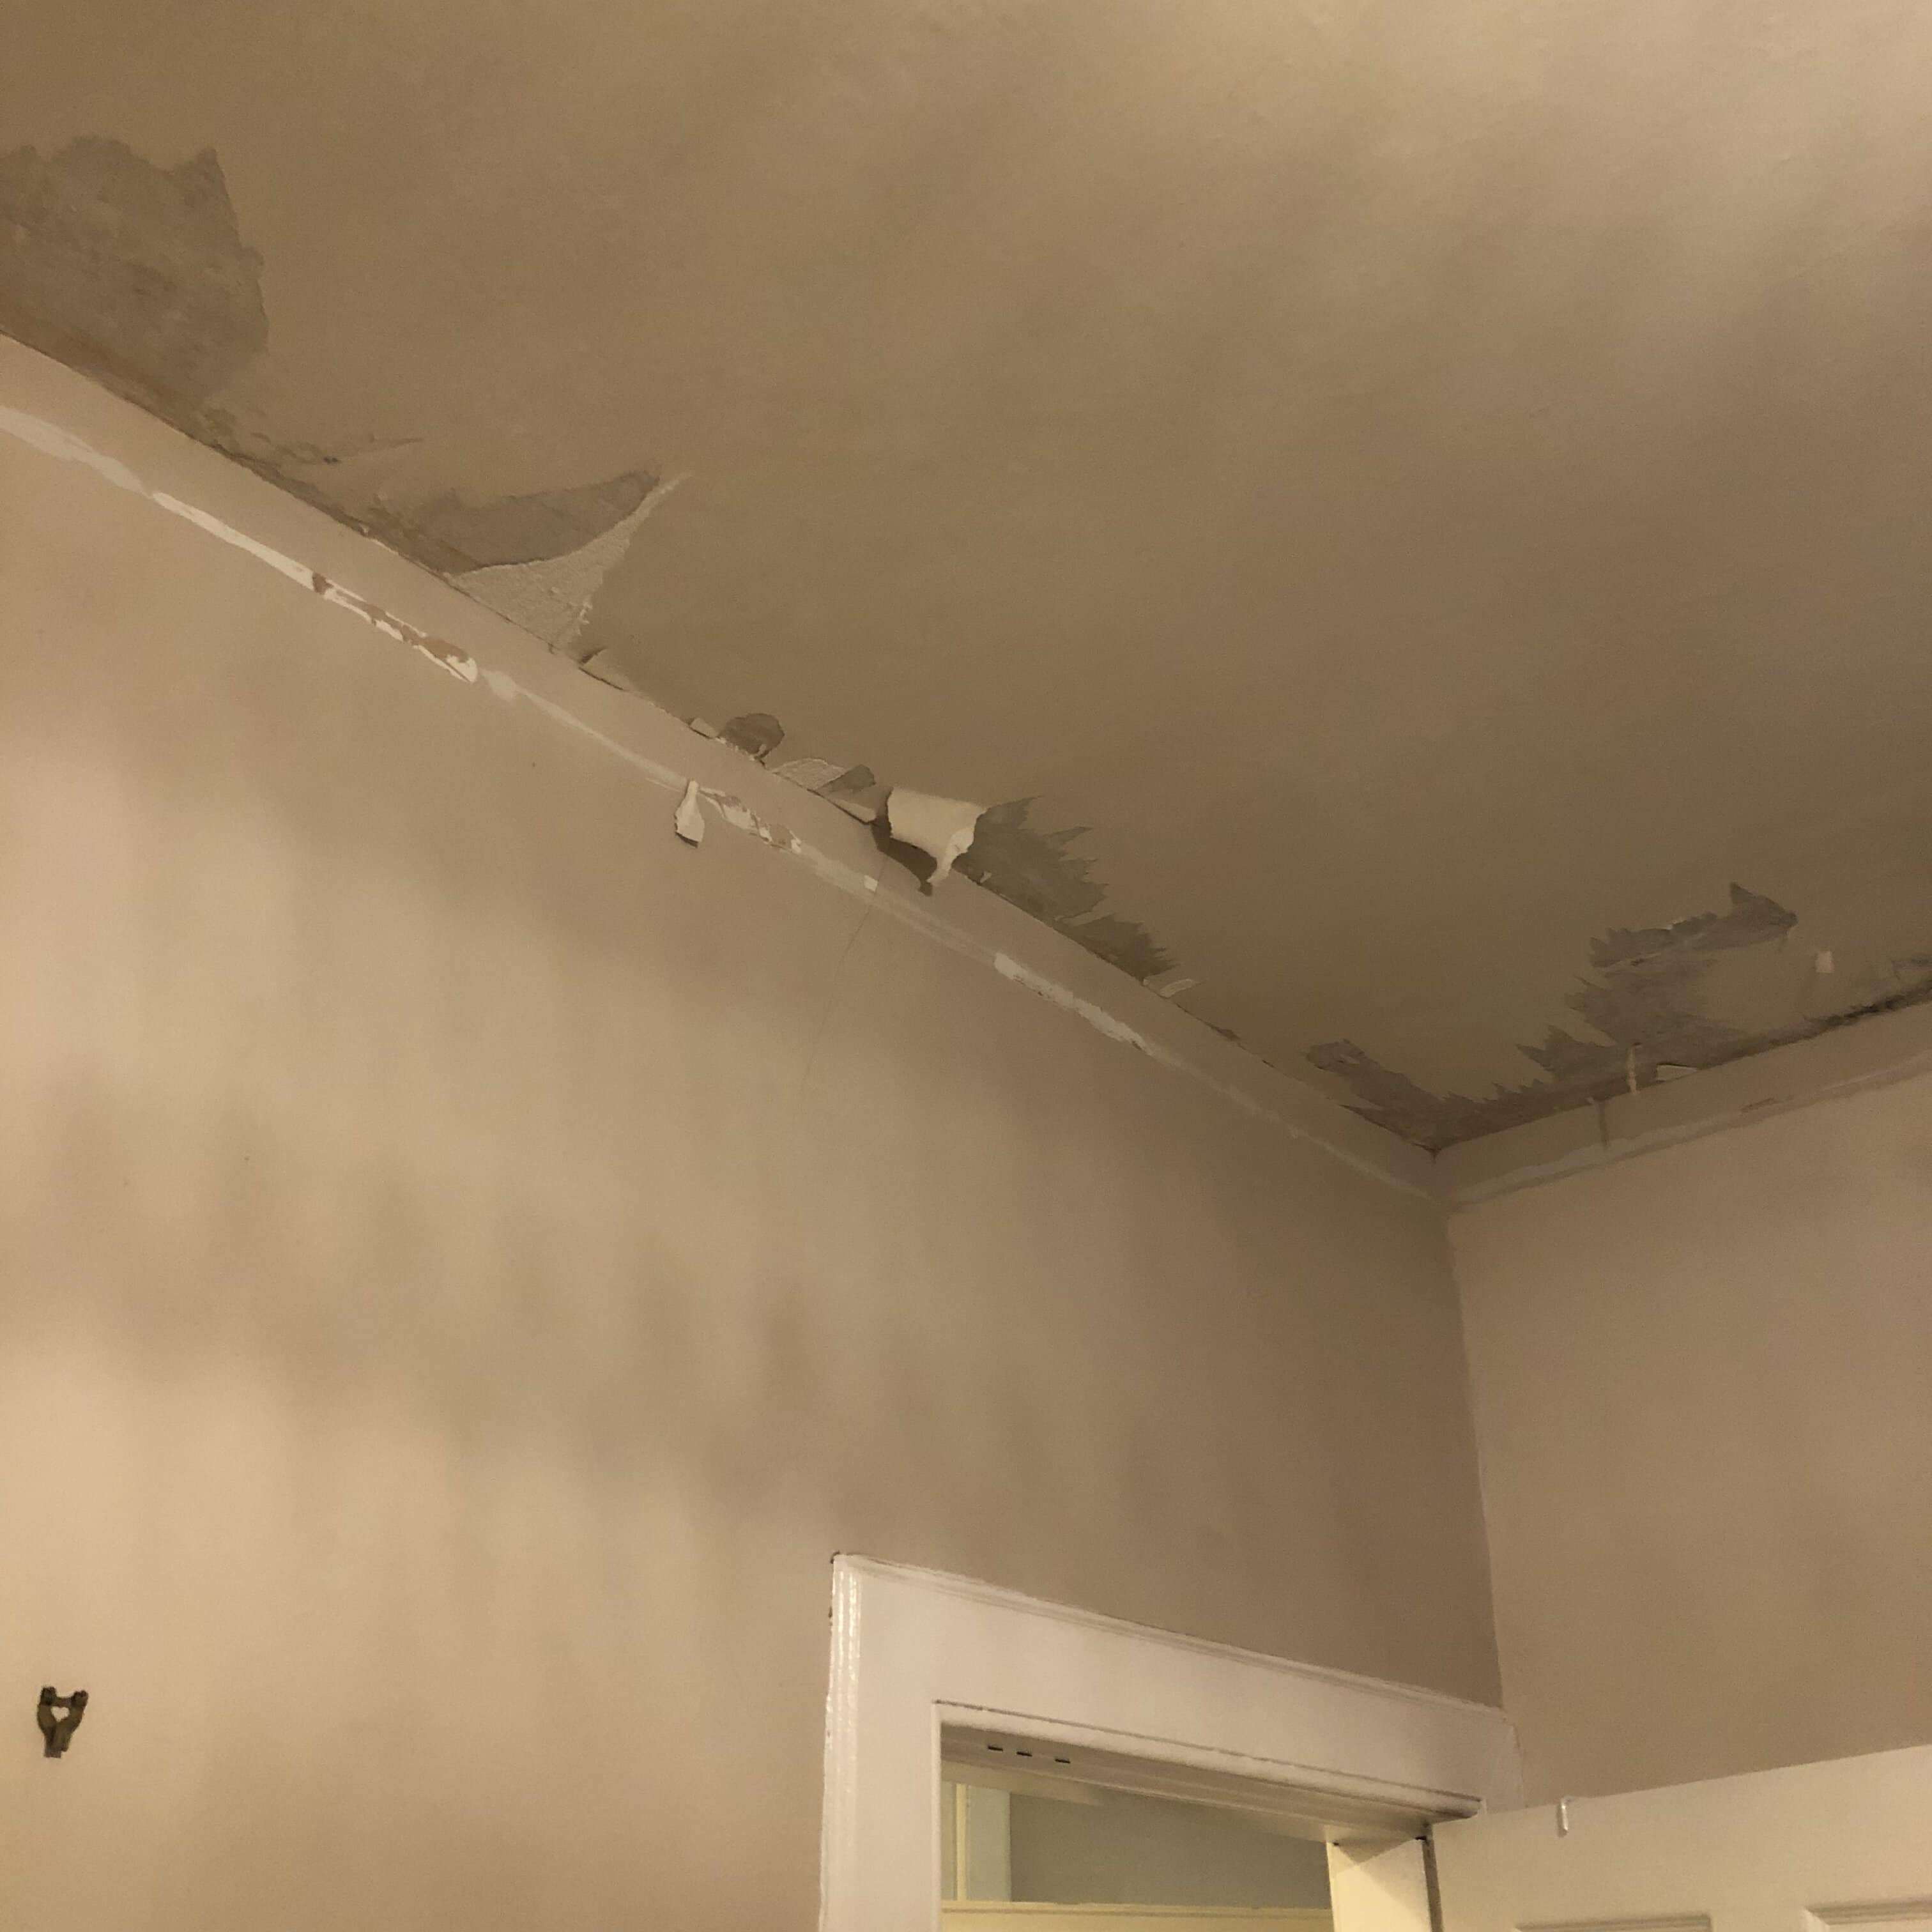
- Old coving removed and replaced with a more decorative and style appropriate for the ceiling height
- Old wallpaper removed from the ceiling
- Ceiling replastered
- Old skirting boards off and replaced with a more decorative and height appropriate style for the ceiling height
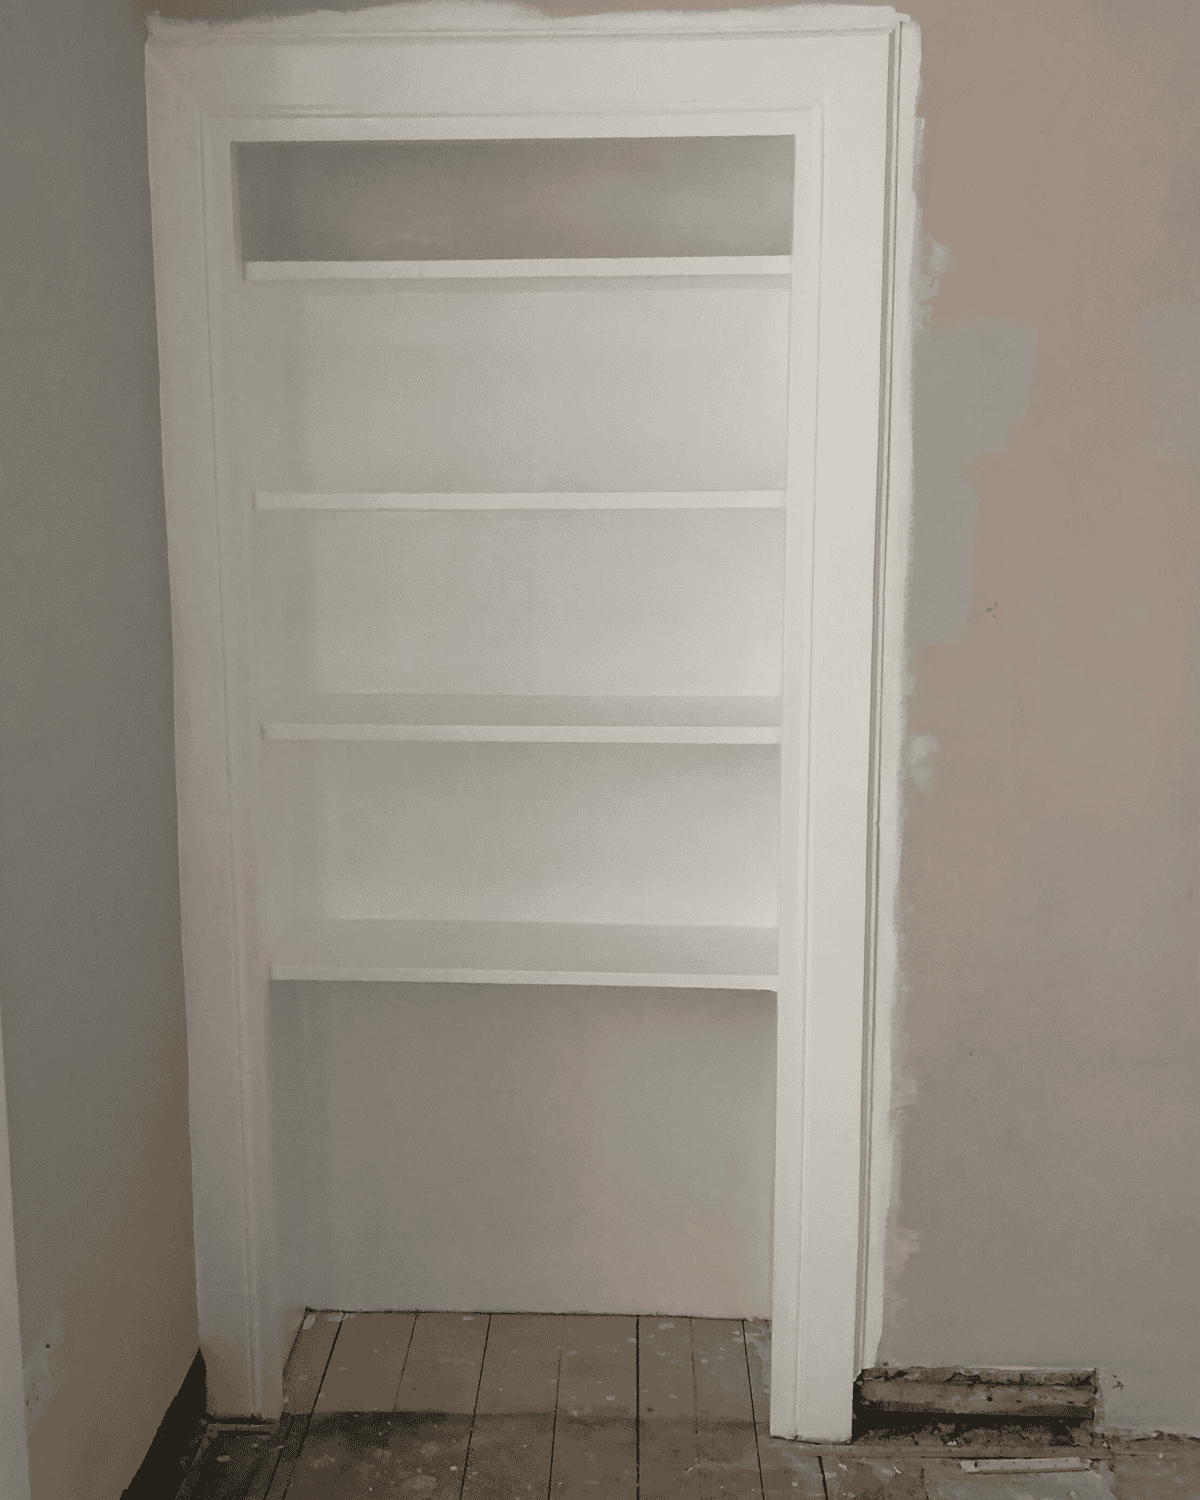
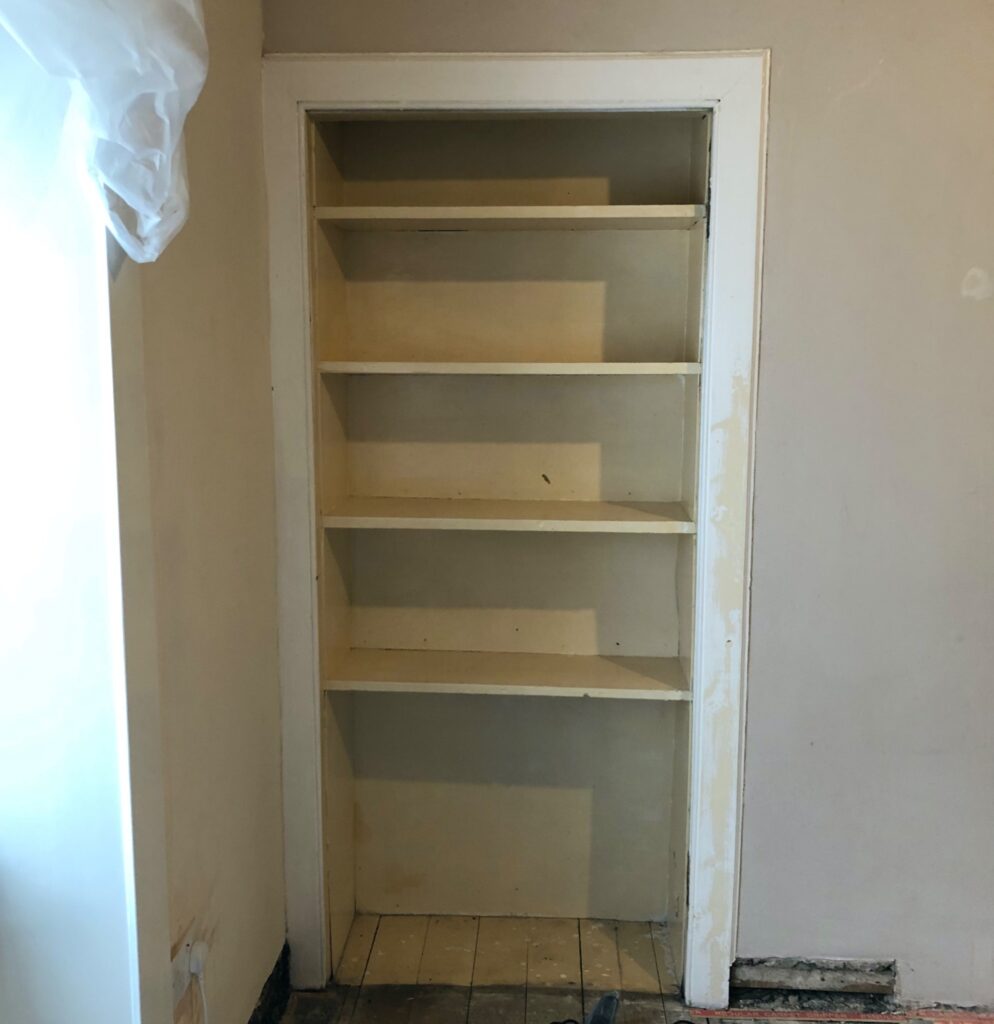
- Cupboard door taken off to allow for ventilation – this was yellow with old paint (see the before & after blog post to see more)
- New carpets, walls painted, wallpapered
- Window surrounds all painted – the windows were tall with a wooden frame surround
Design Details That Made the Difference
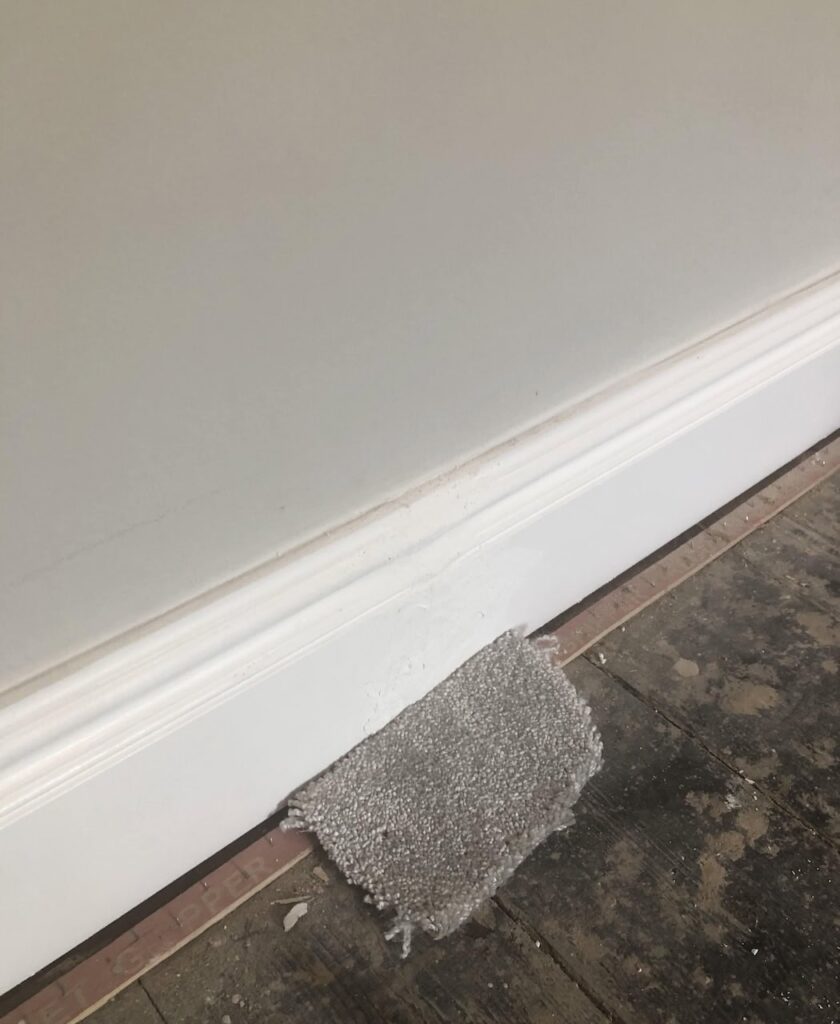
Getting started with paint decisions – everything needed a good freshen up. Due to the room being north facing, getting the tone of the light grey paint correct took more than a few paint swatches.
DIY Learning Curves
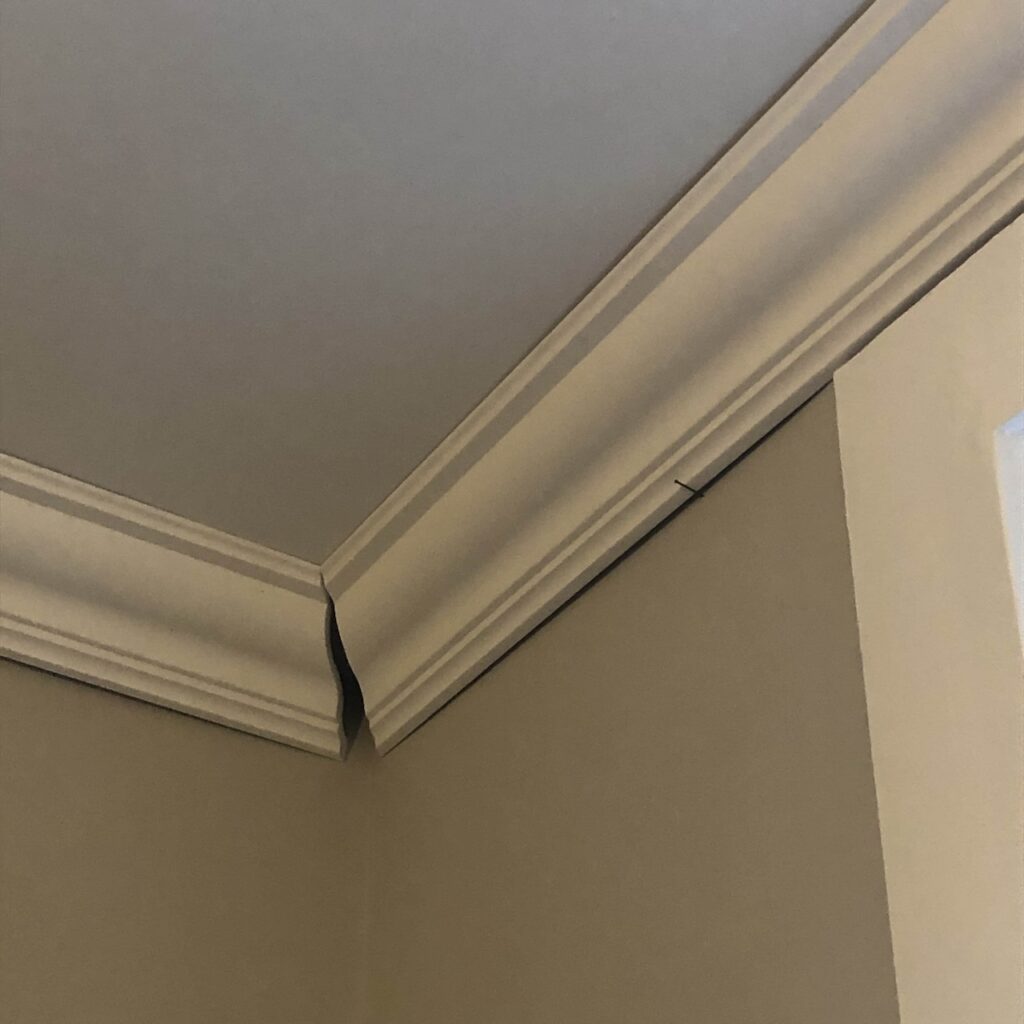
There were a lot of DIY firsts with this renovation. And, with that comes the learning part…..no matter how many YouTube videos or online tutorials were watched, the cut of the angle still didn’t work – possibly due the coving having a larger profile than the standard size in the videos…..so it was cut a bit at a time until it matched!
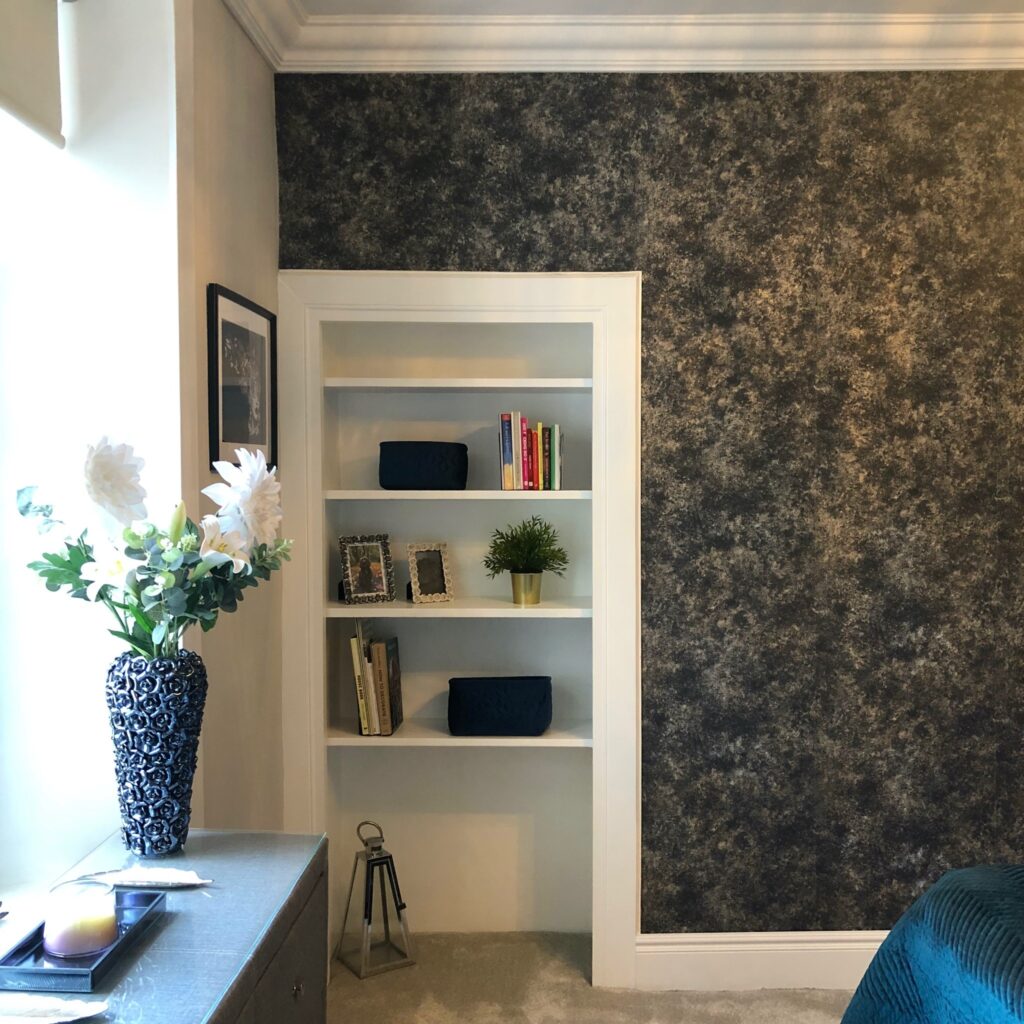
For this room, I love the contrast of the white and navy – it looks fresh in such a shaded/north facing space.
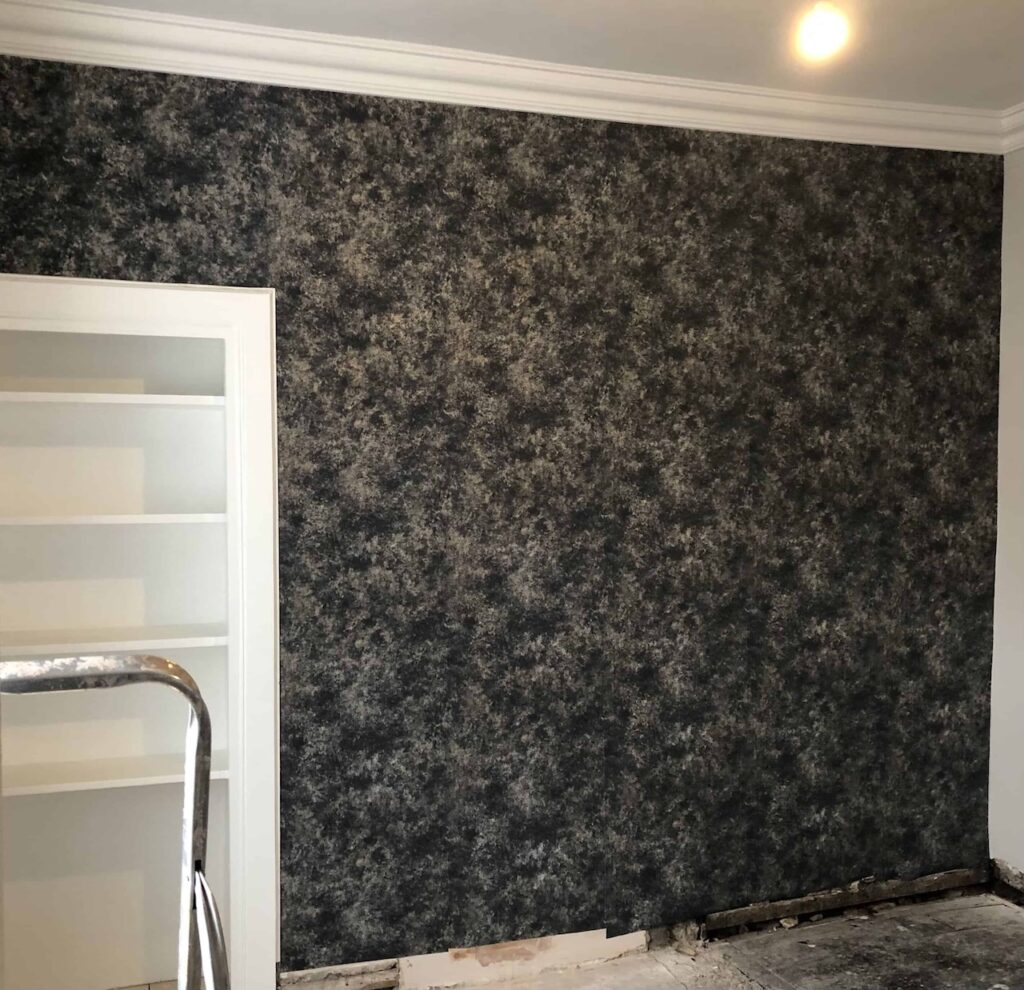
I also love the transformation that wallpaper makes in a room – it’s hard work to hang (especially if you’re short and the ceilings are tall!) and you definitely need a helper but for me it was the first time knowing the room was going to look how I wanted it to once complete.

The biggest misconception of Interior Designers is we can conjure up a room scheme casually in 2 minutes flat. Yes, there’s advice that can be given but if you really want good information then there’s a ton of questions that need to be answered first to deep dive into what you really want and need from a space.
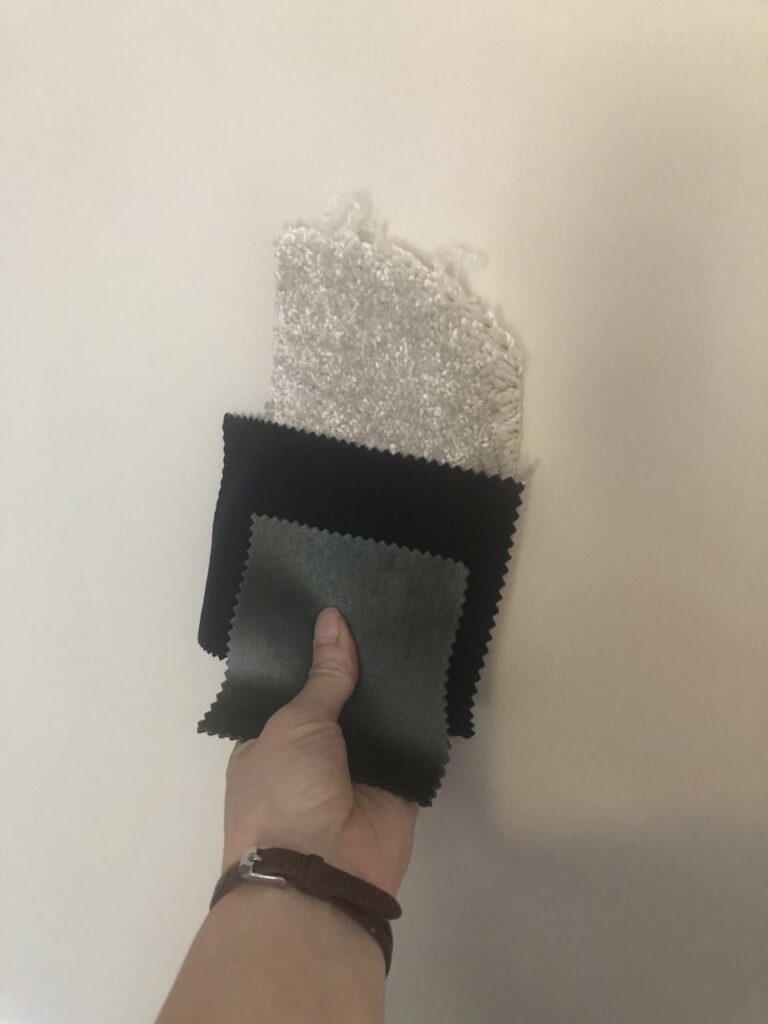
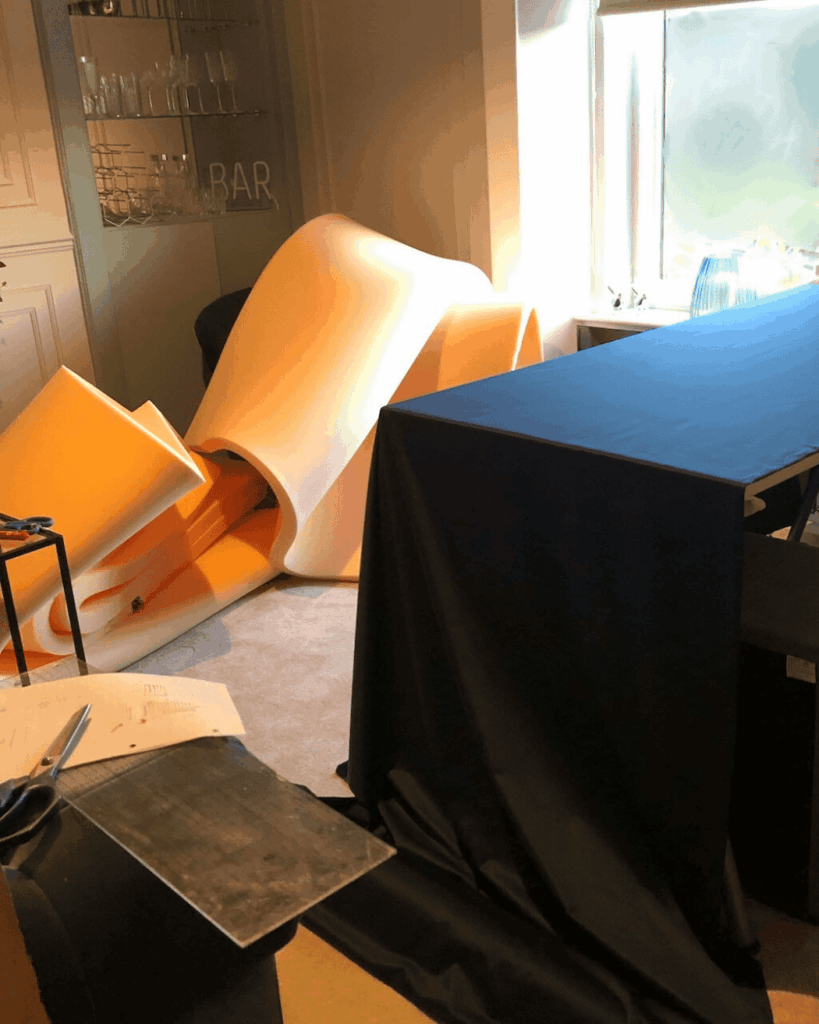
It’s the same when working on our own properties – here’s me gathering samples, testing them against the paint, skirtings, wallpaper after narrowing it down from all the swatches in the earlier photo. Slowly weeding it down to the ones that feel right.
You need to make sure you’re fully happy with each decision. There may be times when you’re slightly apprehensive – I was with my living room paint choice. My advice is to have a back up plan –
- What’s the worst case scenario? Are you ok to redo if you completely hate it?
- Have you narrowed it down to any other options? If the answer is no, is it just because this choice is outside your comfort zone?
Sometimes it’s just a leap into change that we are naturally wired to resist or overthink. I’d love to know in the comments below if you’ve had a situation like this and it worked out great….or not!
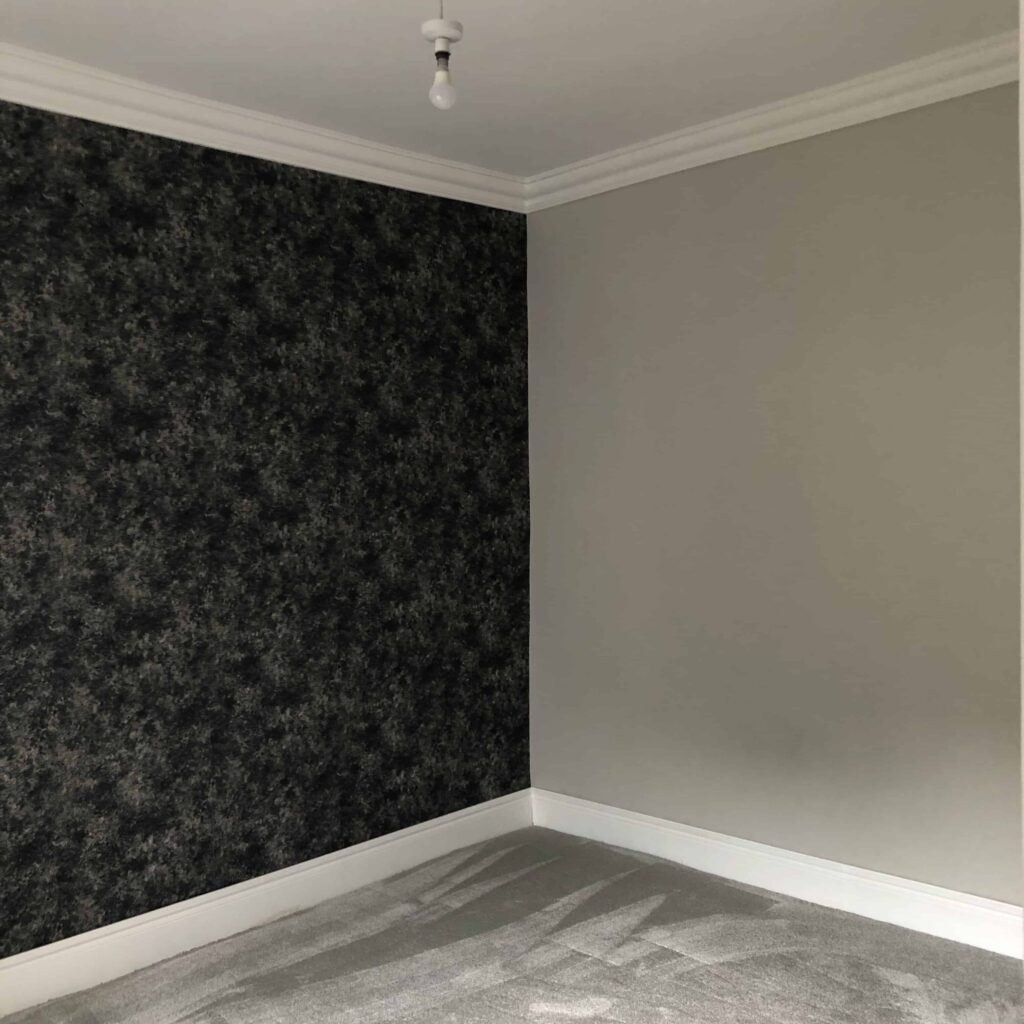
The carpet is now fitted and the room looks so different to how it started – it’s really coming together. The room was so grubby before so it was a great feeling knowing you’ve touched every part of it and refreshed it to be all yours.
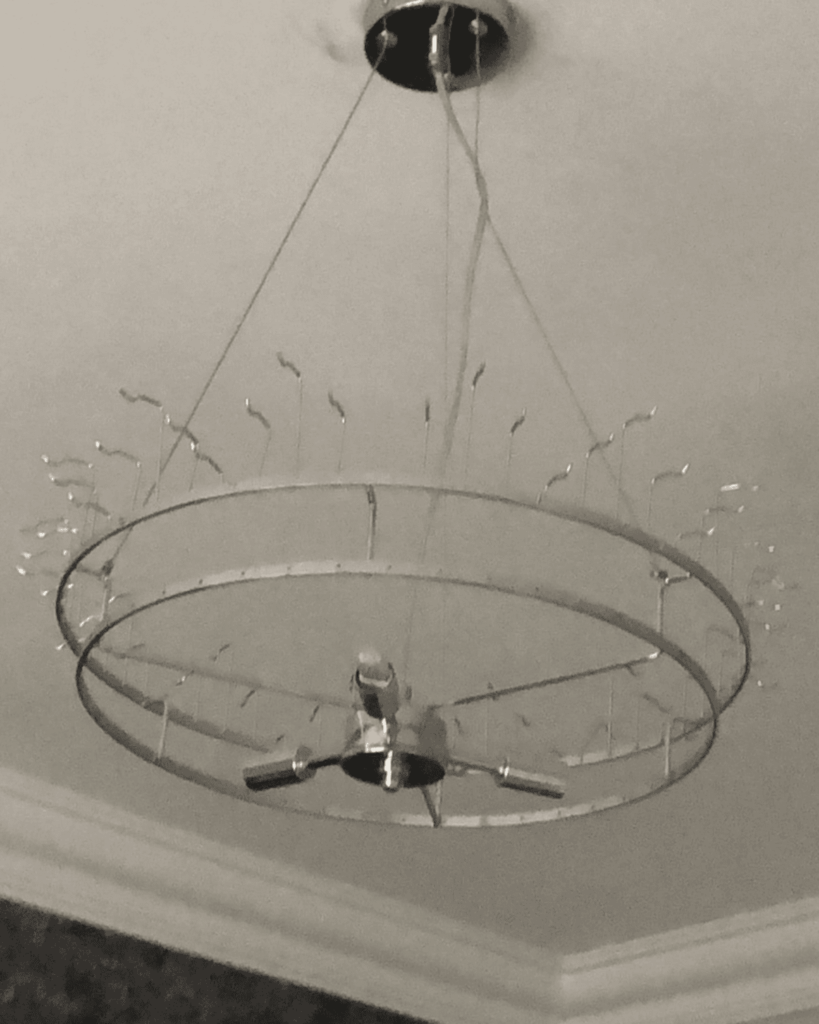
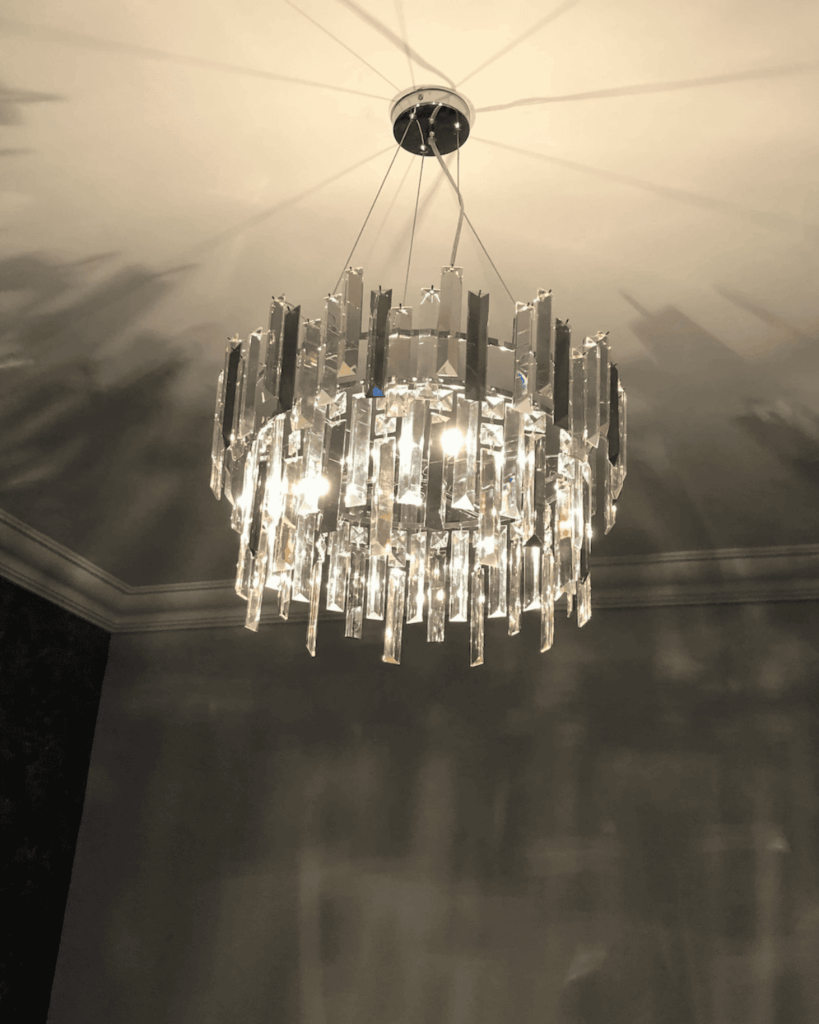
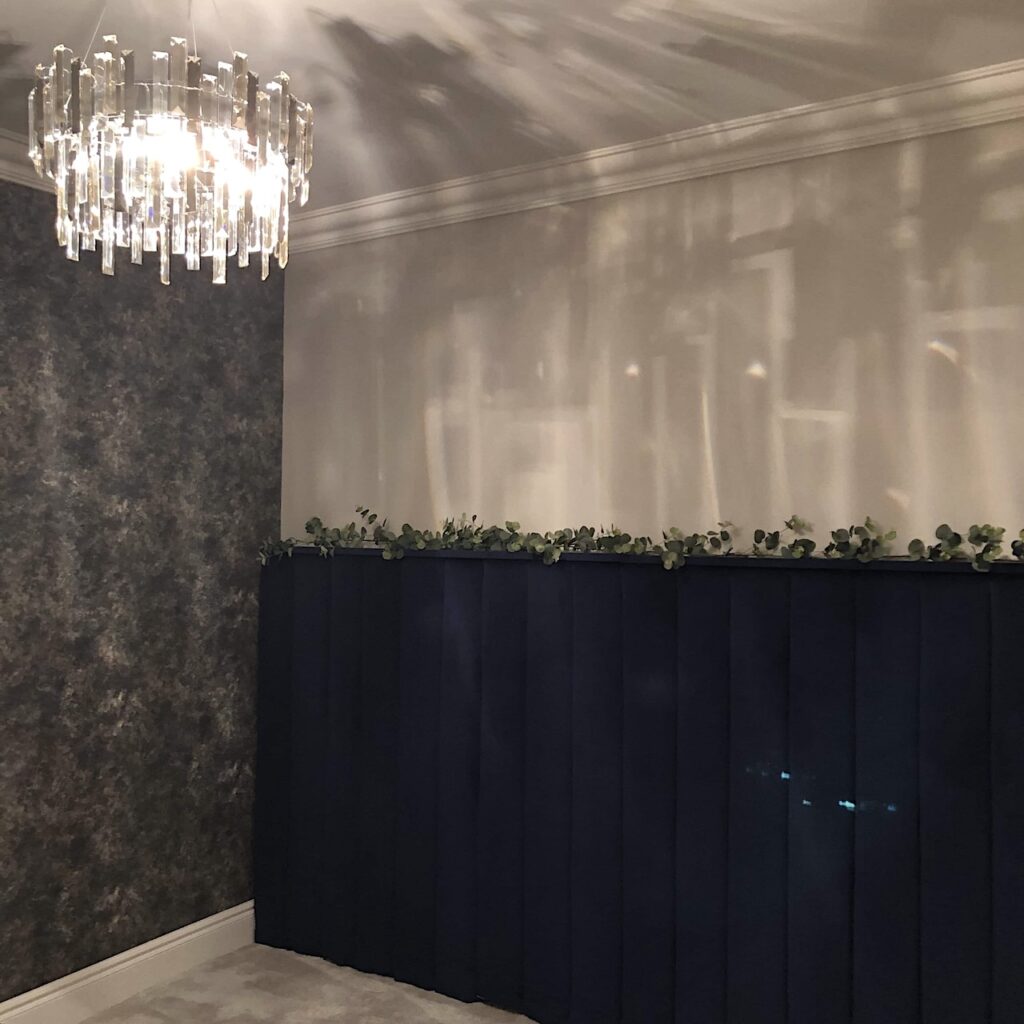
Well, I think I chose the hardest light to put together! There were many rows, three different tones of glass prisms and two styles of fittings…..all up a very tall ladder. But, it was worth it! I absolutely love the shadow its casts when the light is on. Link to ceiling light.
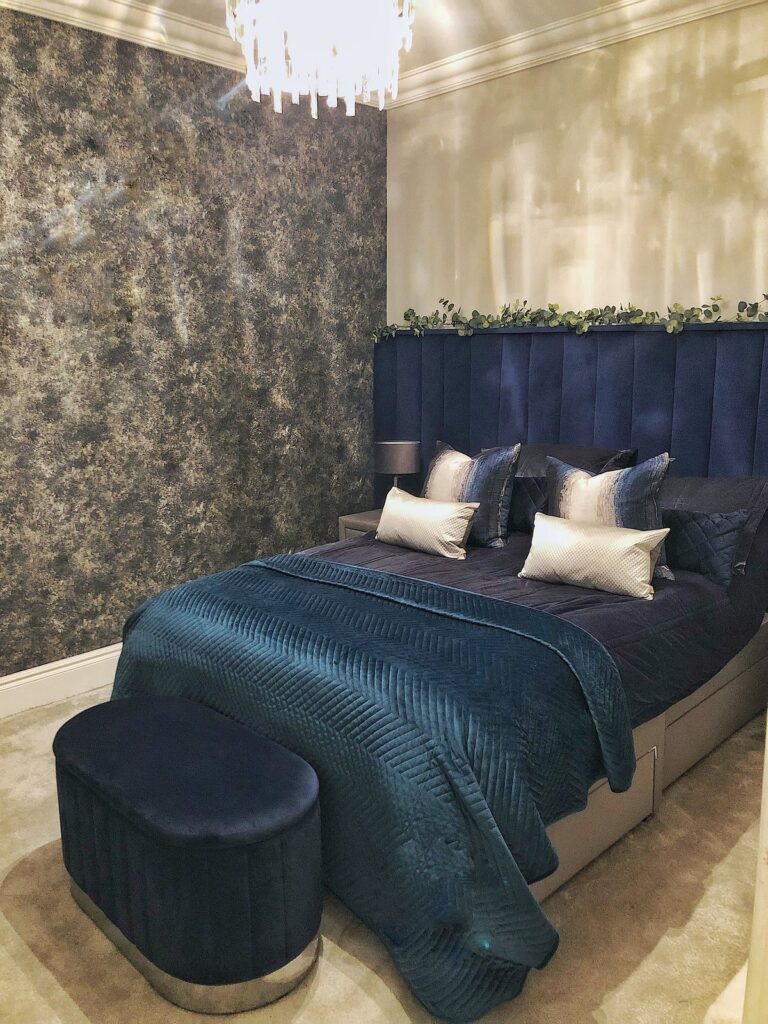
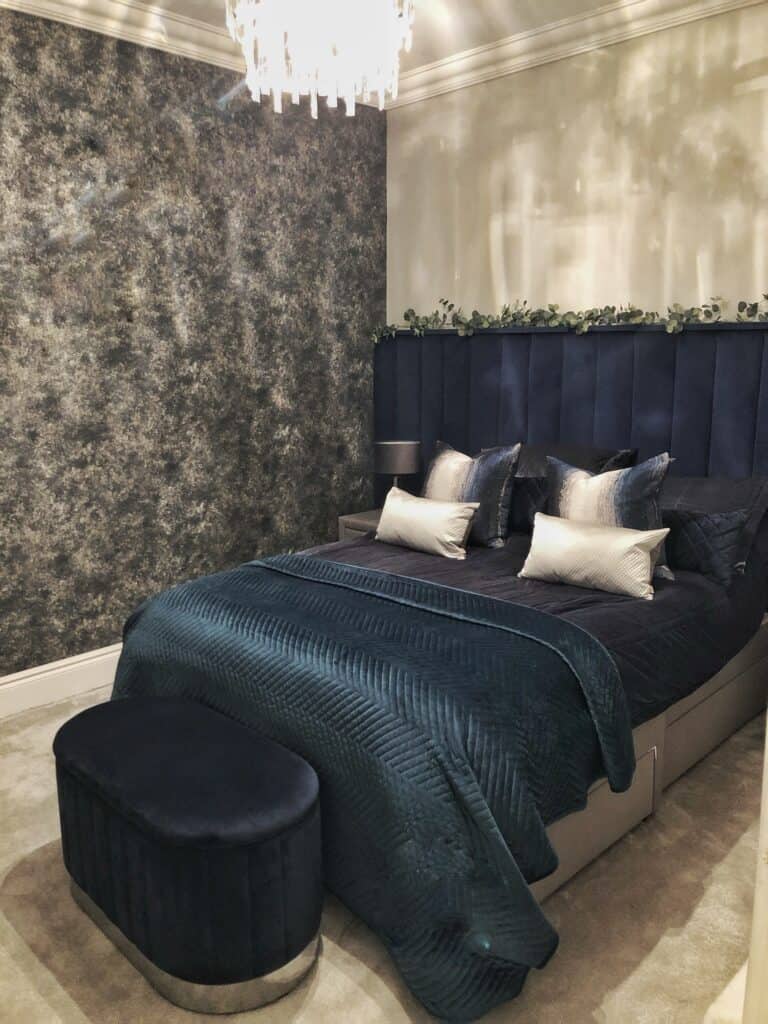
The After – Finished Main Bedroom Reveal
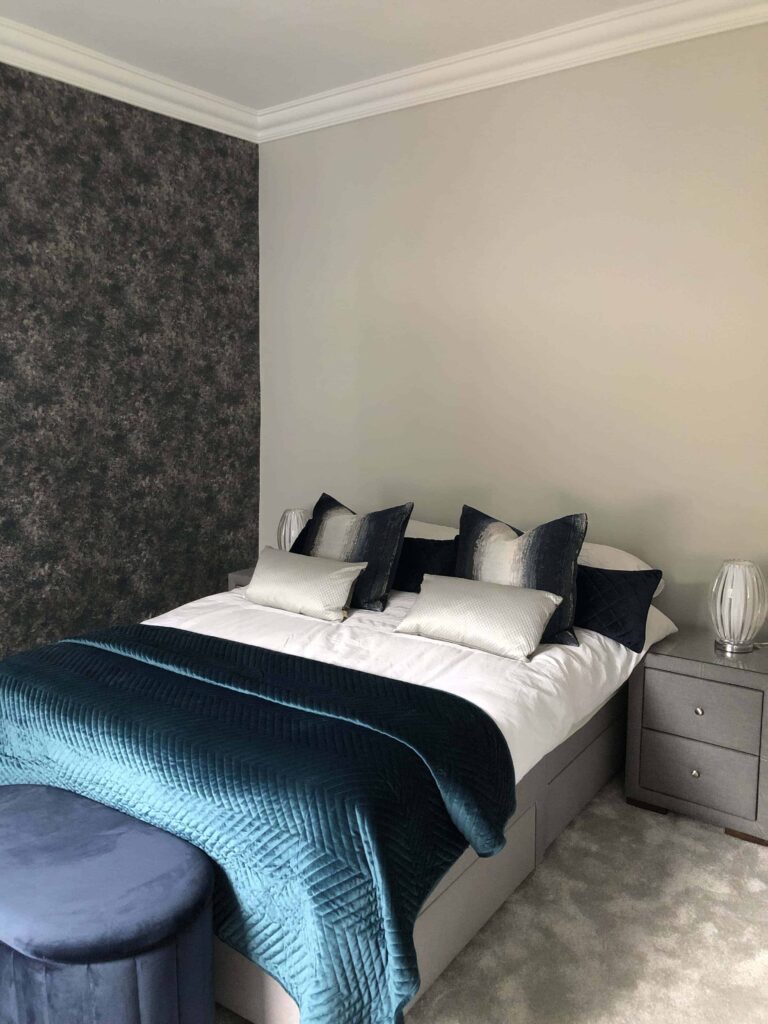
Finally getting some furniture in the room and pulling everything together. Exhausted, but worth it. This was the moment the bedroom transformation really came to life.
Before I decided on the wall-to-wall tall headboard, I thought maybe a shorter headboard and artwork above the bed area but this when I knew I’d made the right decision going with a statement headboard, it needed a statement piece.
Now, as mentioned before, I did move onto another room at this point of the renovation and made the headboard at a later date. To keep the consistency, I’ll continue on with the final part of the main bedroom renovation.
The DIY Statement Headboard
Another underestimation on my part!…….and it was definitely the one DIY project that nearly tipped me over the edge, probably because I knew it was the very last thing to be done and the full property was then completed.
I absolutely love this headboard! It became the main feature of the room and one of my favourite DIY headboard bedroom ideas from the whole renovation.
It looked exactly like I imagined and all done DIY. Previously, I’ve used an upholsterer for client jobs and a joiner to make my last one, that I then upholstered myself but I was determined I was doing this one from scratch.
Finishing Touches
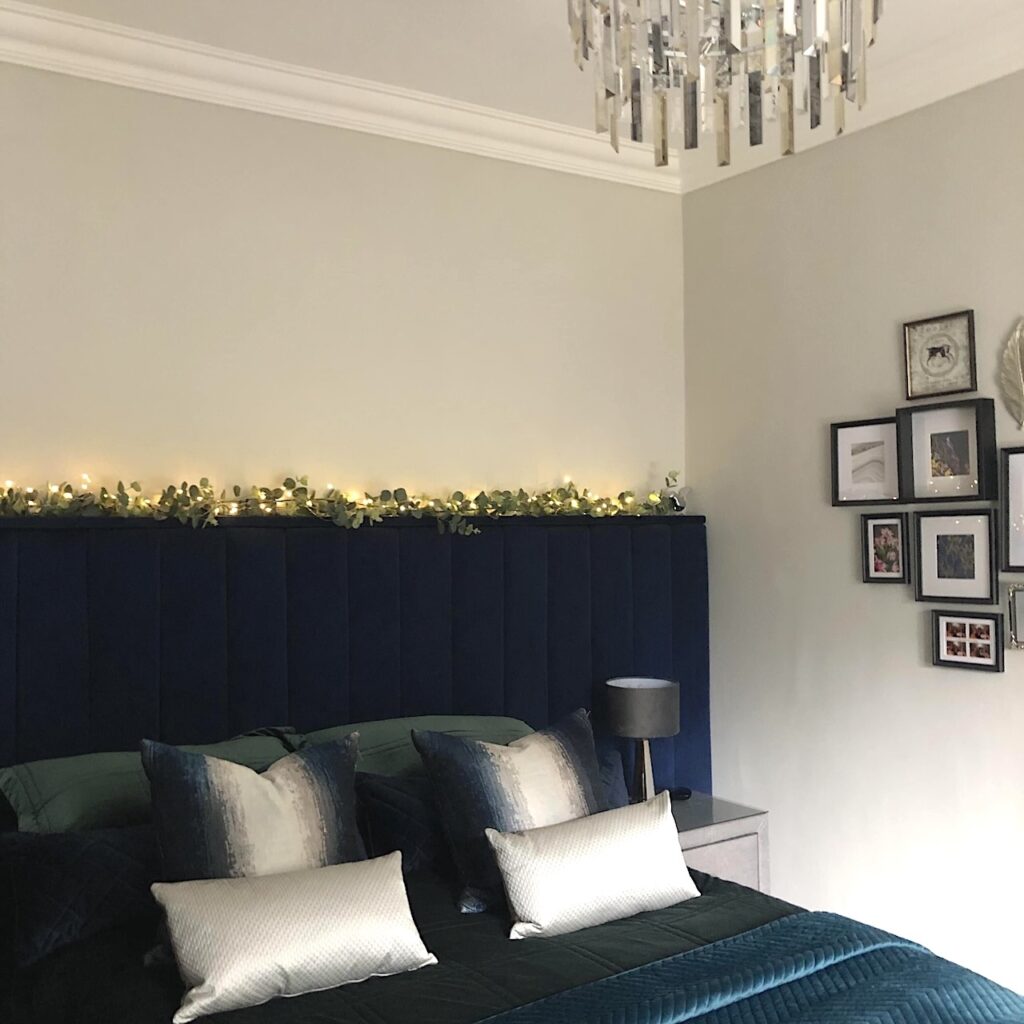
A few candles and fairy lights created the perfect ambience, tying the moody colour palette together. These styling ideas are part of what make my main bedroom renovation ideas easy to recreate and use in other rooms also.

Sorry for the extremely dark photo (old phone) but it helps to show the moody vibes created in that bedroom.
Before & After Photos
Main Bedroom Decor & Styling Choices
The colours used in this bedroom were navy blue, dark greens, metallic champagne tones, grey/silver tones for the walls and carpet and contrasted with crisp white. Oh and touches of greenery to balance the space. Mixing lots of colours is about getting the balance right, it may take some tweaking but it gets there in the end.
Furniture & Storage Solutions
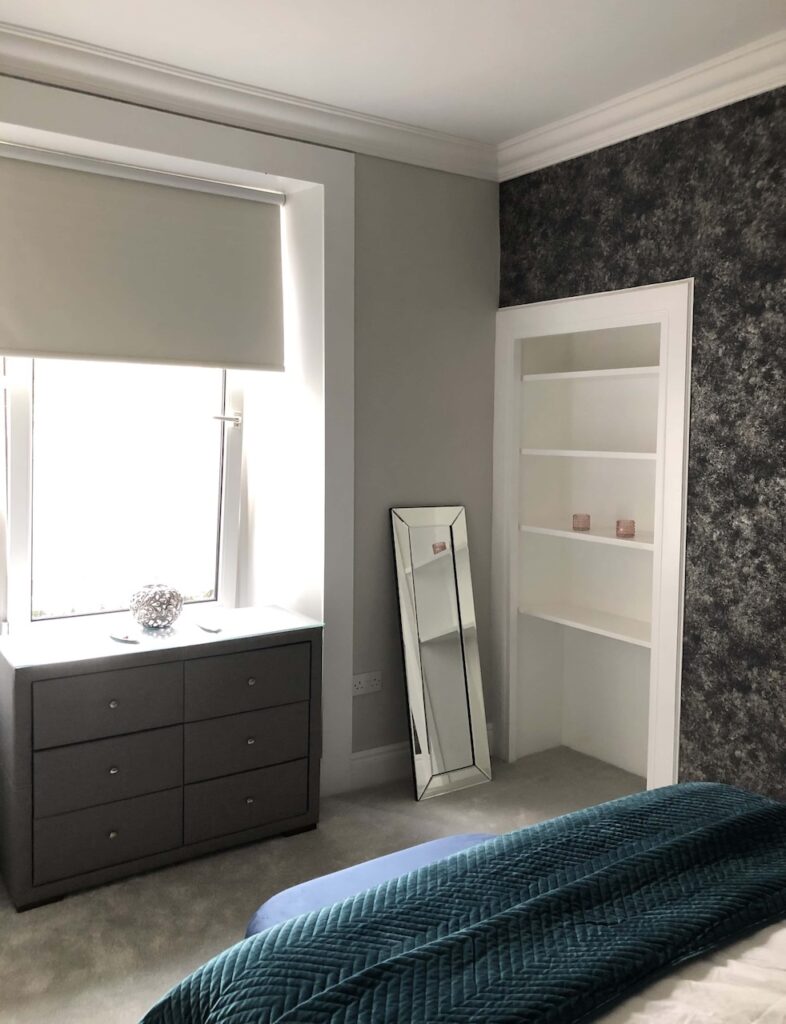
Throughout the property I kept visible storage to a minimum. In this main bedroom I had under-bed storage, double drawer bedside units, a chest of drawers in the bay window area. My guest room was used to keep more chest of drawers and the wardrobe, allowing my bedroom to stay minimal and decluttered.
Accessories, Textiles & Lighting
Even though I was happy with how this bedroom turned out, I would’ve loved to have finished styling the shelves. I used some accessories that I had lying around but never managed to utilise the shelving area fully unfortunately.
I would’ve loved to have put long decorative lights hanging above each bedside table but to be honest…..I was done. I achieved what I set out to do and if I was staying in the property for the long term I would’ve definitely added some more lovely details.
Final Thoughts
Not everyone likes the same things, and that makes life a whole lot more interesting. I always prefer to make things a little more dramatic than the norm – something you will be able to notice for sure when I share my living room renovation journey with you.
Keep an eye out for that post as I pushed myself outside my own comfort zone but it turned out even better than I could’ve imagined. I’ll be sharing more Victorian home renovation projects soon, so stay tuned.
Source List & Shop the Look
I’ve listed as many of the room finishes as I can – some items may be out of stock.
Paint, Materials & Decor Pieces
- Wall Paint Colour
- Wallpaper – TBC
- Woodwork
- Ceiling Chandelier
- Bedding – Discontinued – Here are some similar
- Cushions – Discontinued by Trade Supplier
- Black Frames – Ikea
Overall, I love this room. It was the first room done and it still tied in perfectly with the rest of the rooms that I was making up as I went along 😆.
If you liked this post, head on over to my home renovation series where I share the before & after, full home tour and each rooms individual journey if you like all things renovation (I’ll be adding more room renovations very soon).
For more home decor inspiration, follow me on Instagram, Facebook and/or Pinterest.
Take care.
Pin it for later 🖤